6 Steps for Go-BlotV2 Setup:
This page has been put together with new operators in mind. We've compiled some safety and instructional information that we hope you find useful.
Set-Up and Wifi Connection
A Western blotting device has never been so flexible and easy to use as the new GO-Blot™ V2. There are three tray sizes to choose from and infinite (nearly) combinations of Protocols to create.
Setup Steps:
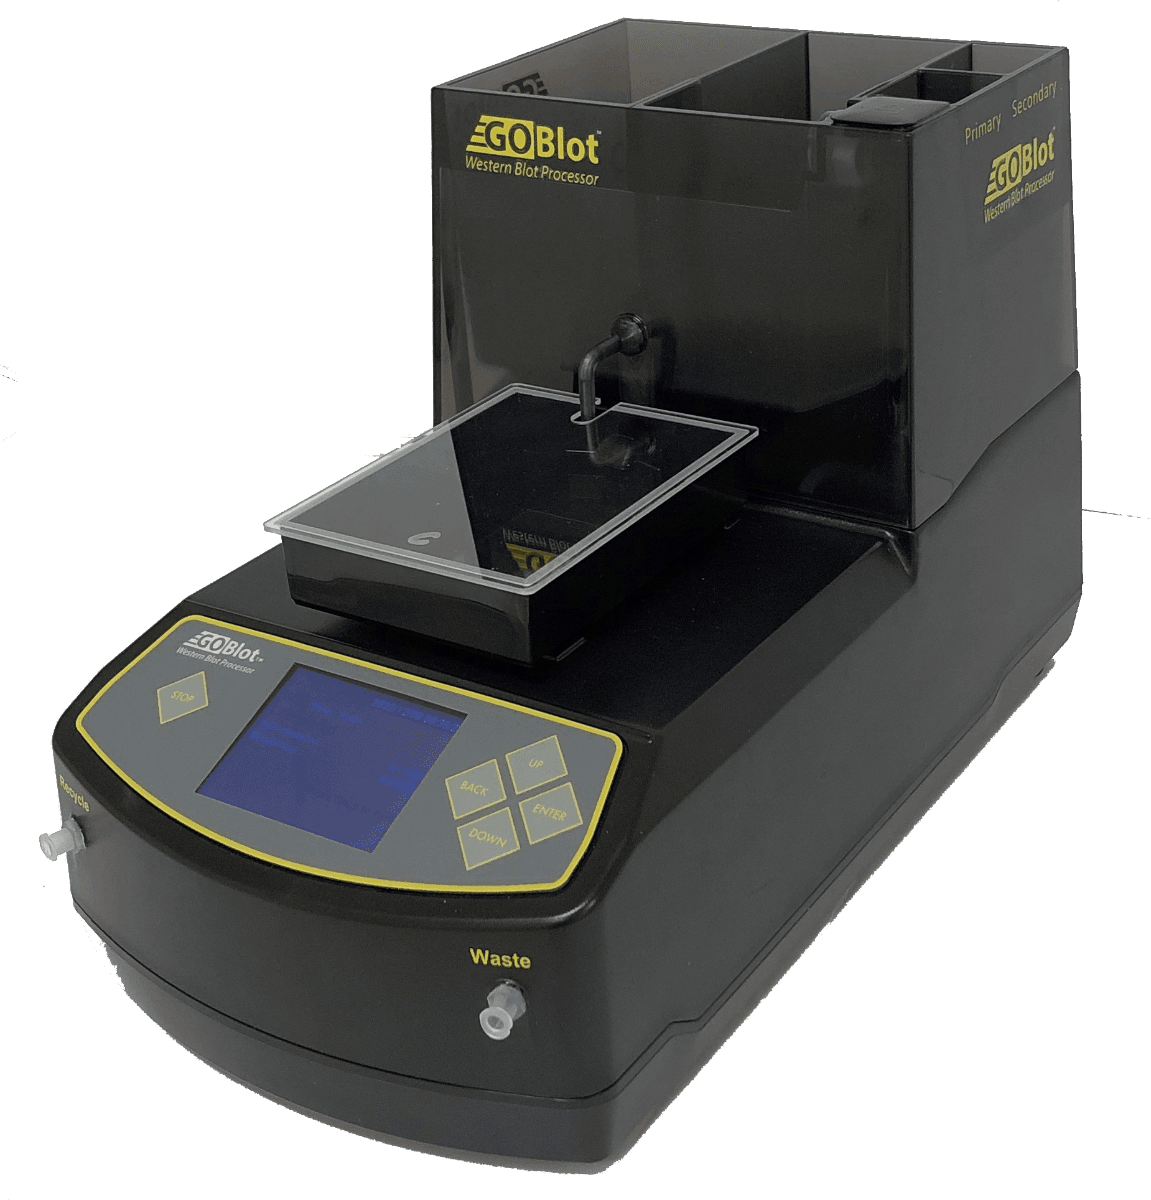
- Place the GO-Blot V2 device on a stable flat bench and check with a level that the lower surface of the unit is level in the x and y directions. Adjust level if necessary.
- Chose a tray size and lightly smear silicone or vacuum grease on the tray’s out port.
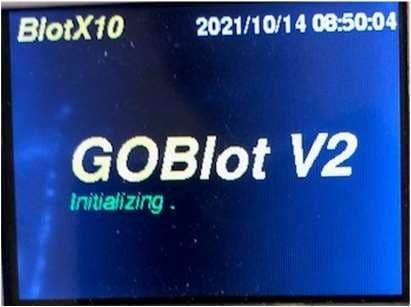
- Fit in the tray as shown below, and turn on the power.
Wifi Connection Steps:
You may proceed directly to the Pre-defined Protocols at this stage by clicking Run Protocol (see later). To set up the Wi-Fi:
- Scroll down by clicking “Down” button, to Run Network Date/Time Setup.
- Click “Enter” button.
- Scan the QR code.
- Type in your network’s Web or Wep ID and a new IP address obtained from your IT dept.
- When the IP is confirmed, make a label and attach to the GO-Blot V2 in an obvious permanent place. Next time anyone wants to use the device they can just type this number into their phone’s web browser.
- Click “Enter” to complete the process.
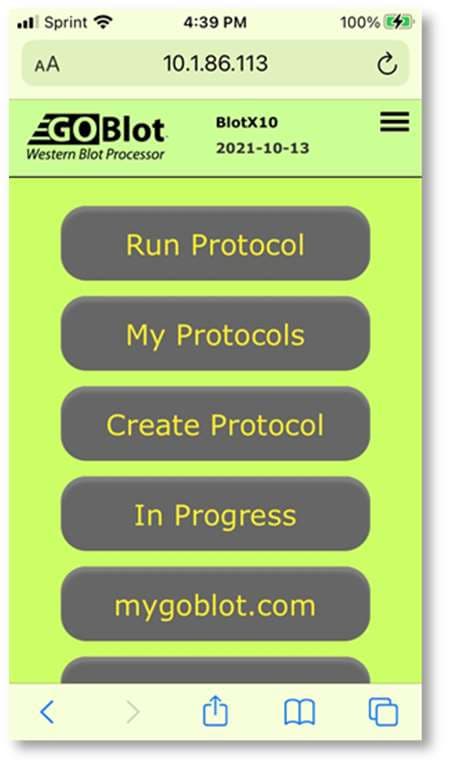
- Open a browser on your phone, type in the IP and see the control panel in the browser.

Operating Go-Blotv2 interface on mobile:
Open a browser on your phone, type in the IP and see the control panel in the
browser.
Note: This control panel can also be pulled up on a local computer’s browser by typing in the same IP address.
Tip: Search for a vacant IP address on your network or scan network for devices
- Open a browser and search for “Download Advanced IP Scanner”
- Download and open software.
- Run the scan to see a list of IP addresses and their devices.
Pre-defined Programs
Choose from 10 Pre-defined Protocols or try out the new phone interface to create your own.
Seleting pre-defined programs steps:
Warning: do not load solutions until the Water Wash Protocol has run.
- When in front of the GO-Blot V2 machine, click the “Back” button until you see the Main Menu.
- Then scroll up or down, by clicking the “Up” or “Down” buttons to highlight the “Select Program to Run” line.
- Click the “Enter” button.
- Scroll down to the desired protocol and click Enter.
- The protocol detail will show up.Note: see the manual for a detailed list of pre-defined programs
Note: see the manual for a detailed list of pre-defined programs
Programming
Creating custom protocols may be necessary for specific antibody applications. Utilize the steps below to easily create custom protocols to fit your needs.
Custom protocol programming steps:
1. Open a browser in a computer or phone.
2. Type in the IP address of the GO-Blot V2 into the address bar and tap Enter or Go respectively.
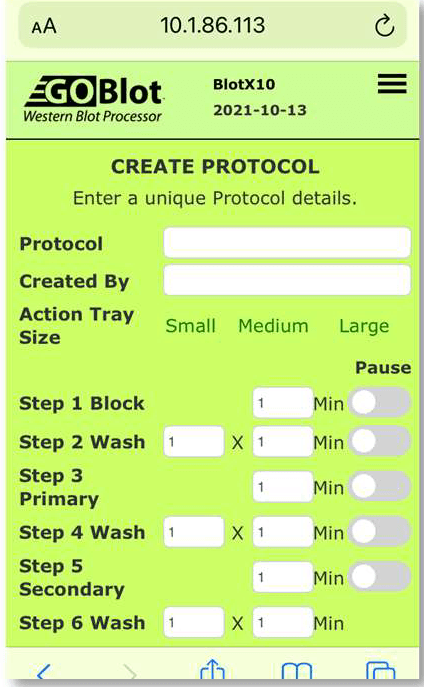
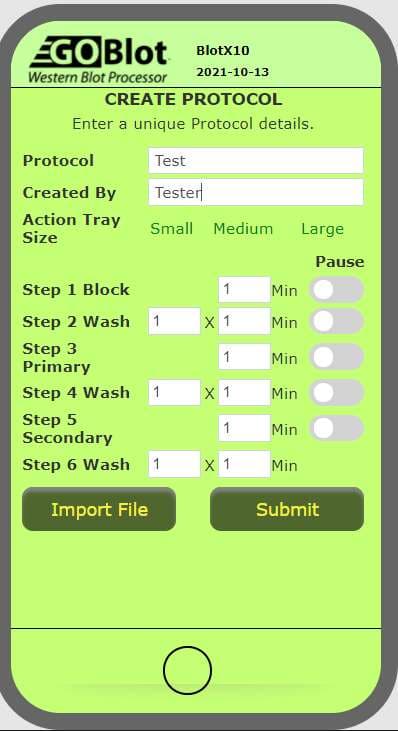
3. Tap on “Create Protocol” and the second screen below should pop up.
4. Fill out each field with appropriate data, e. g. the wash steps have two data points, the first one is number of washes, the second is length of each wash in minutes. Wash volume is automatically determined by the Buffer Reservoir and the Tray size
5. Once the complete protocol has been added, tap “Submit” to save the new protocol. Protocols are listed chronologically, so this protocol will be at the end of the list.
Note: The Large tray type will be limited automatically if there are too many washes, the maximum number of washes for the Large tray Is 12 total.
Note: If you cannot see the Submit button on the iphone version, shrink the screen and/or tap on AA symbol at top left, and chose “Hide address bar” option.
Running a Protocol
Warning: do not load solutions until the Water Wash Protocol has run.
A Water Wash is necessary to start using your GO-Blot V2 and to ensure all systems are working well. A Water Wash is also recommended after greater than 1 week without a run. Sometimes the last operator might forget to clean the machine with a Water Wash, in this situation the Water Wash has to be run before using the machine.
- While standing next to the GO-Blot V2 check that no solutions are in any reservoirs or trays.
- Connect the luer locks with tubing to the front of the machine.
- Place the left and right-side tubing into a waste container.
- While on the Main Menu, scroll down by clicking the machine’s “Down” button until you reach the Run Protocols line.
- Click the “Enter” button.
- Scroll down to highlight the Water Wash, and click Enter.
- An alert should pop-up indicating to fill the Water Wash reservoir, lets do this by adding xxx ml to the container which covers the level sensor (see p.5 for locating the parts).
- The alert should disappear and the option to Run the protocol appears, click Enter to run the protocol.
Note: The same approach is used to run a protocol, except you need to add Blocking solution and membrane to the tray, TBST (or PBST) to the Buffer reservoir and appropriate Primary and Secondary antibody solutions to their respective receptacles. Also, place the right-side “Recycle” tubing into a clean recycle vessel (e.g. 15 or 50 ml disposable tube). Then chose a protocol from the list. Pre-defined Protocols are at the top of the list and User defined (with a “U” before the number) ones at the end of the list.
Using mygoblot.com
Visit mygoblot.com to set up your user account, and store your results to share with your lab or the global community. In addition, there is a growing community of users that share their successful protocol/antibody combinations on the Global Western Portal.
Retrieving data
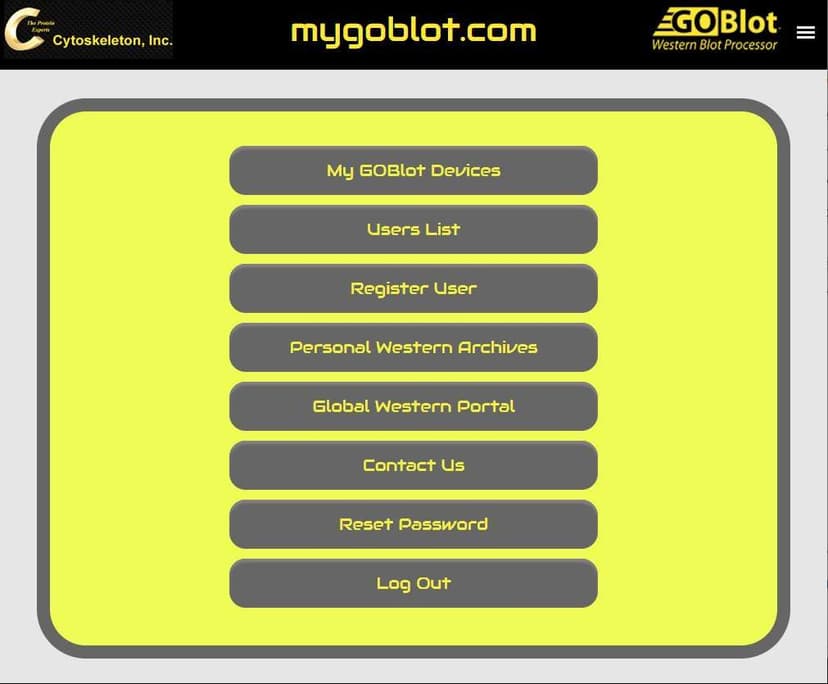
- Logon to https://mygoblot.com
- Click on the fourth bar down called, “Personal Western Archive”
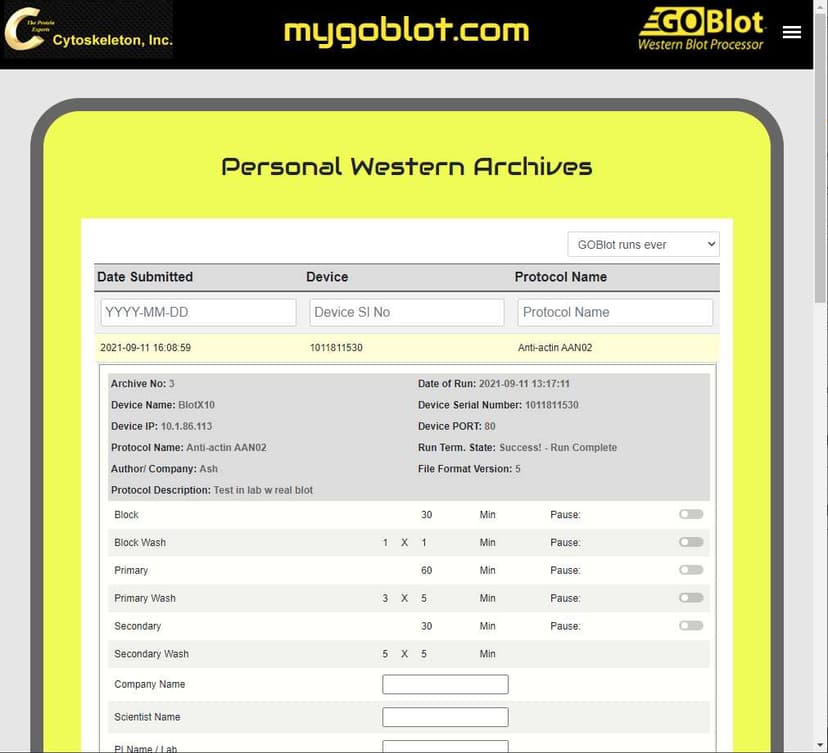
- A list will pop-up as shown in the second screenshot.
- Click on the one you want to open (You can select the name or date rangy by the table's title drop down menus)5. The third screenshot shows the run data.
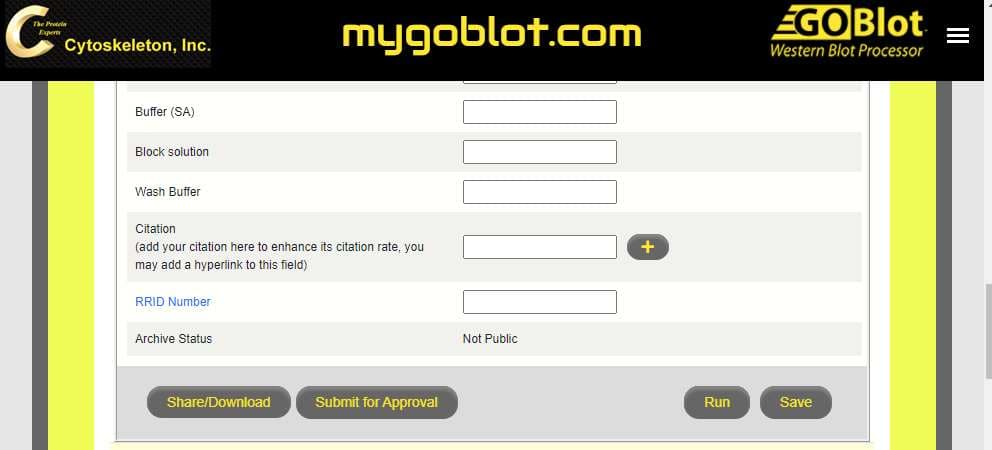
Uploading results to complete an archive
Note: The empty boxes are ones you can fill in with experimental data and save, or save and submit for publication on the Global Western Portal.
- Click in a box to start adding text.
- Click on a yellow + sign to add a hyperlink
- Click on upload files to add your experiment-tal blot image.
- Click Save to save data.
Submitting a Routine to the Global Western Portal
- Fill out all fields of a Personal Western Archive.
- Click Save to save content.
- Scroll to the end of the file and locate the “Submit for Approval” button, and click it.
- With two days you will receive a notification of approval or additional questions before approval.
Downloading a Routine from Global Western Portal
- Go to the homepage of https://mygoblot.com
- Click on Global Western Portal.
- Using the table’s title search field, e.g. type in the Antigen of interest.
- A short list of matches will pop-up. Click on one row.
- Scroll to the bottom of the record, and click the “Share/Download” button.
- Chose one of the options and click on it, a “json” file will download.
- Receiving on the phone requires opening the email app and “sending” the json file to the Downloads folder.
Importing a file to a GO-Blot V2 device
- Open the GO-Blot V2 device control panel in a browser (see Section 4 above).
- Click Create Protocol.
- Scroll down to the “Import file” button.
- Select the file from your download folder.
Note: If you cannot see the Submit button on the phone version, shrink the screen and/or flick the address bar off the top of the screen e.g. on iPhone tap on AA symbol at top left, and chose “hide address bar” option.
Note: Download folder locations vary, on the iPhone they are denoted by the xxx symbol, whereas for the Android they are denoted by the xxx symbol. On the computer they are found in the main C:/Download folder for PCs, or the xxx icon for apple computers.
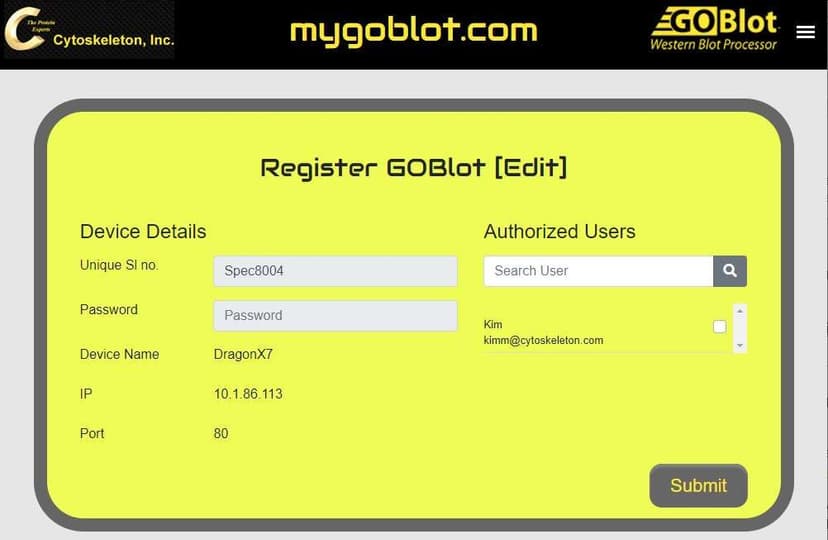
Setting up users in mygoblot.com
When you purchase a new GO-Blot V2 your name will be used as the main user (i.e. administrator), yes you have become an administrator! Also, you will be given a Serial Number, keep both of these close to the GO-Blot V2 so we can identify it if needed later.
- Login to https://mygoblot.com using your user name and Serial Number.
- Go to the My GO-Blot Devices button and you will see your machine. if you do not see it call Customer Support (303-322-2254) or email [email protected] .
- Now go back to the home page by clicking on top of the webpage, and click the “Register User” button.
- Type in the User’s credentials and click Save.
Note: The person who bought the GO-Blot V2 unit will be the Main User, all others are called Lab Users. If this needs to change contact Customer Service at the email above.
Note: For multiple GO-Blots it is useful to have the same person buying them so that the Main User stays the same and all other lab personnel are entered via the Main User.
Maintenance and Troubleshooting
Occasionally you may want to flush out all residues from the GO-Blot V2 device. The best way to do this is to add 1 x SDS-running buffer from a PAGE system (e.g. a standard composition is 50 mM Tris-HCl pH 6.8, 100 mM NaCl, 0.1% SDS) to all the reservoirs. Then choose the Water Wash protocol to run the solution through the system. Then perform two more Water Washes, but this time use only water to remove the buffer components.
- While standing next to the GO-Blot V2, connect the luer locks with tubing to the front of the machine.
- Check that no solutions are in any reservoirs or trays. If they contain solutions, then run a Water Wash protocol to remove the solutions.
- Place both tubes into a waste container.
- While on the Main Menu, scroll down by clicking the machine’s “Down” button until you reach the My Protocols line.
- Click the “Enter” button.
- Scroll down to highlight the Water Wash, and click Enter.
- An alert should pop-up indicating to fill the Water Wash reservoir, then add xxx ml to the container which covers the level sensor (see p.5 for locating the parts).
- The alert should disappear and the option to Run the protocol appears, click Enter to run the protocol.